Notice: Undefined variable: post_id in /data/wordpress/htdocs/wp-content/plugins/pressapps-knowledge-base/public/partials/page/page-single.php on line 41
Adding users to Moodle workspaces

Article sections
- Primarily, users enter Moodle workspaces through Peppi’s implementations, instruction: Moodle workspaces for implementations. Other ways to get users into workspaces are a metal link and a workspace key. Several keys/connection methods can be set to the Moodle workspace. These are set on the Participants page of the workspace.
- With metallinking, students participating in another workspace can automatically access the contents of the other workspace as well. By making metal linking, students of a certain workspace can already be determined to belong directly to a certain group in the linked, new workspace.
- In order to access the workspace, the teacher can also specify a key, i.e. a password, which the student can enter as a user of the workspace. It is also possible to define joining a certain group in the key when joining the workspace.
- The sub-course creates a link to another workspace and enables the direct transfer of a grade from working in another workspace to another workspace. Using a sub-course does not move users to the sub-workspace.
Moving to the How to add participants page
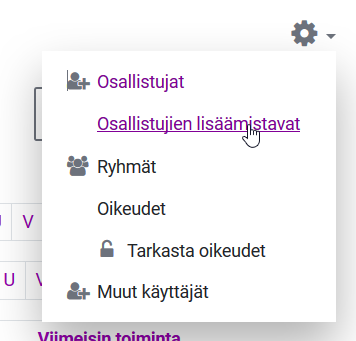
When you are in work mode, select Participants from the Navigation menu. On the Participants page, there is a wheel button, which you can press to open a menu. Select Ways to add participants.

- On the summary page, you can see the available addition methods.
- You can edit these if necessary (gear icon).
- You can enable or disable the adding method with the eye icon.
- Trash removes the enrolment method.
- You can add a new method from the drop-down menu (Add entolment method).
Metalinking of Moodle workspaces
Metalink picks up all the members of one workspace as participants in another course. NOTE Metalinking does not create the same kind of connection between the implementation and the users of the workspace as by making the connection with Peppi’s implementation. In this case, the management of the participants is done in Peppi and the participant information is automatically updated in the Moodle course area. Instructions for combining several implementations into one workspace.
Use the metal link if you want students in one workspace to automatically be included in another workspace as well. Reminder: metal linking does not create the same kind of connection between the actual implementation and the users of the workspace as by making the connection with Peppi’s implementation.
Creating a metalink
Create a metalink to the workspace where you want to connect the students of another workspace.
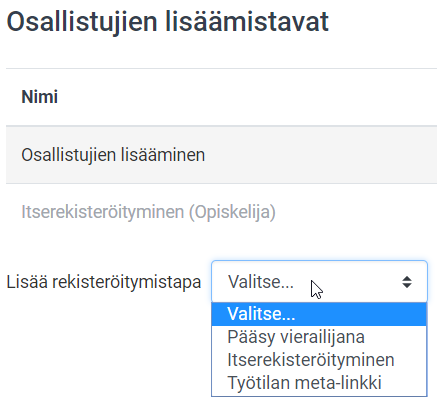
- Siirry työtilassa For the How to add experts page, help. Add method and choose Workspace metalink from the list.
- Select from the Link course list which members of your own course (students) you want to join this course as a whole group, click Add entolment method.
- You can also write and search for a suitable course by name from the menu.
If you want to include the members of several workspaces, repeat the previous steps for each implementation to be added. Metalinks should eventually appear in the list as many as there are attached/linked implementations.
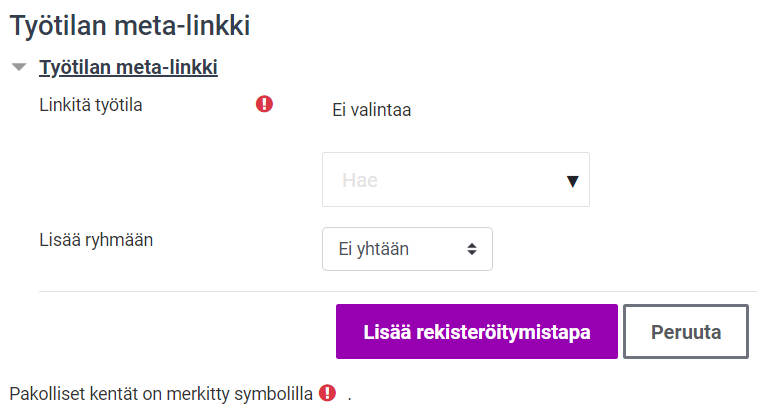
If you want them to be automatically added to a certain group, you can make a selection under Add to group.
- If you create new groups, add grouping to the groups afterwards as well, so that you can easily later manage the different groups in the workspace, Guide.
An enrolment key for a student
Enter workspace For the How to add enrolment methods page, instructions.
- If you already have Self-registration (Student) among the ways to add participants, edit it via the gear icon and change the desired course key.
- If the way to add participants is dimly grayed out, the way to add is not in use. Press the eye icon to activate the add method.

- If the Self-enrolment (Student) enrolment method is not found in the list, you can add it via the drop-down menu (Select > Self-enrolment).
- Configure or edit key settings.
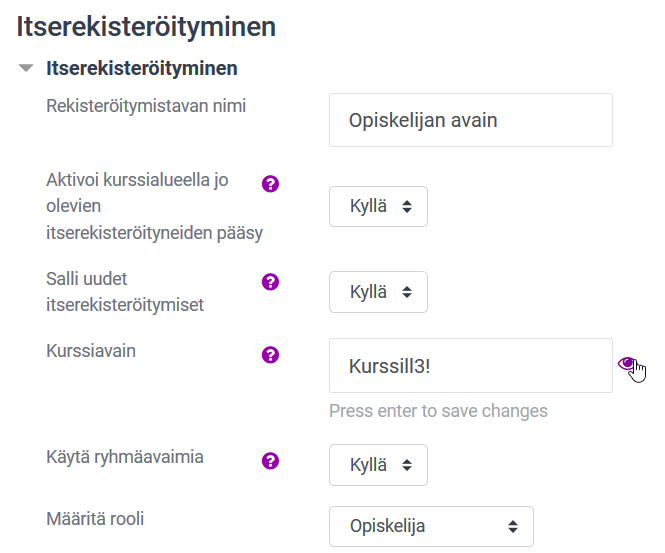
- Enter a descriptive name for the registration method. Specify the course key. NOTE. The key must contain at least one uppercase letter, one lowercase letter and one special character.
- The Define role setting defines the role of the users who enrolls.
- The default is student.
- If you want, you can also create a welcome message for students that they will see when they join the workspace. Remember to always save the changes.
NOTE! If you want to allow any Moodle user to enroll in the workspace, enable self-registration, but do not add a course key. If you want to limit the course to a certain group, the key must be determined and notified to them separately.
Adding an single user
An individual user (e.g. a visiting teacher) can also be added to the workspace manually. When you are in Workspace, select Participants from the Navigation section. On the Participants page, press the Add participants button.

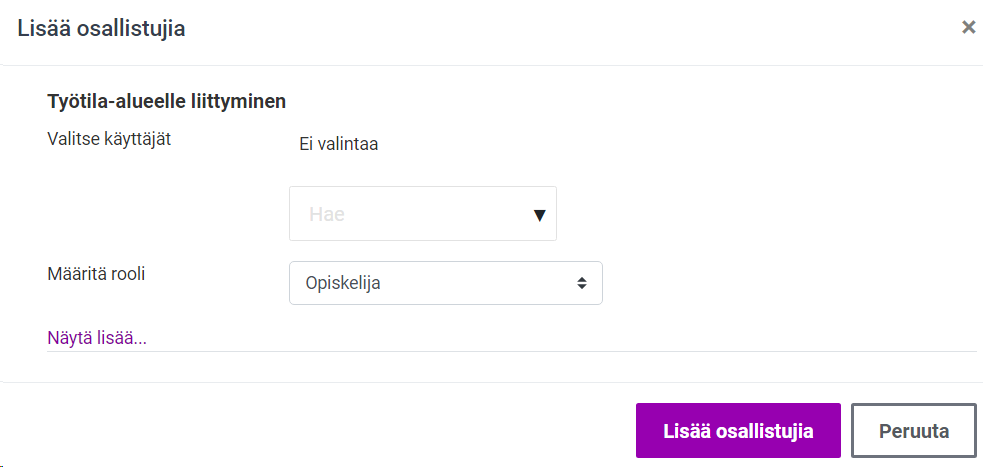
- Enter the name of the user to be added in the search box and add the desired user from among the users suggested by Moodle by clicking on the right user’s information.
- In addition to the name, you can see the email address of the user.
- There may be people with the same name or it may be an expired ID, so be careful. You can add as many users as needed at the same time.
- Finally, select the Add Participants button.
Notice: Undefined variable: output in /data/wordpress/htdocs/wp-content/plugins/pressapps-knowledge-base/public/partials/page/page-single.php on line 83
